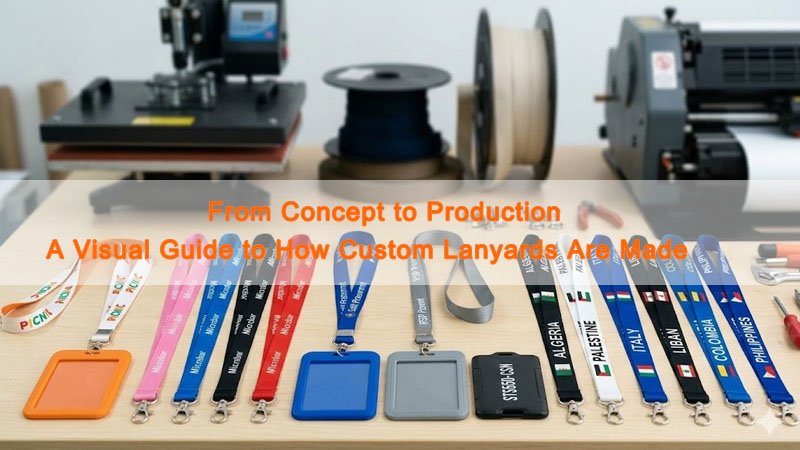
Custom lanyards may look simple, but producing them consistently at scale requires a controlled manufacturing workflow. From requirement planning and artwork preparation to printing, assembly, inspection, and packaging, each stage affects the final product’s appearance, durability, and delivery performance.
This visual guide explains how custom lanyards are made from concept to production, with practical insights to help buyers make better decisions, reduce delays, and improve order accuracy.
Overview: The 9 Key Stages of Custom Lanyard Production
A typical custom lanyard order goes through nine key stages:
- Define project requirements
- Prepare artwork and review design
- Choose the right lanyard material
- Select the printing or branding method
- Approve samples or pre-production proof
- Run webbing preparation and printing production
- Cut, sew, and assemble hardware
- Perform quality control and inspection
- Pack and prepare for shipment
Skipping or rushing any stage can lead to avoidable issues such as color mismatch, logo misalignment, hardware errors, or delivery delays.
Why Understanding the Lanyard Production Process Matters
For corporate buyers, event organizers, schools, and distributors, understanding the production process helps improve both communication and results.
When buyers know how custom lanyards are made, they can:
- provide clearer specifications
- select more suitable materials and branding methods
- identify potential risks earlier
- approve samples more efficiently
- set more realistic production and shipping timelines
In practice, most delays come from unclear requirements or late changes—not from the production process itself. A clear understanding of each stage helps reduce back-and-forth communication and improves overall project control.
Step 1: Define Project Requirements
Every successful order starts with a clear specification. Before artwork is finalized, the manufacturer needs to understand the intended use, technical requirements, and delivery expectations.
Key information to confirm at the start
- Application: employee ID, event pass, school use, promotional giveaway, retail merchandise, industrial access
- Quantity
- Target budget
- Lanyard width and length
- Hardware type: split ring, lobster clasp, bulldog clip, swivel hook, detachable buckle, etc.
- Safety features: breakaway buckle, safety release, etc.
- Packaging requirements: bulk packing, individual bagging, labels/barcodes
- Required delivery date and shipping destination
Why this stage matters
A complete requirement list allows the manufacturer to recommend appropriate materials and printing methods, provide a more accurate quotation, and reduce revisions later in the process.
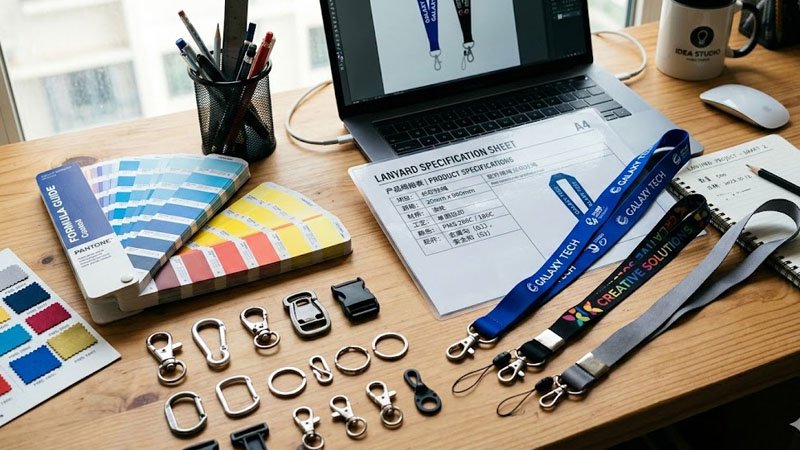
Step 2: Prepare Artwork and Review Design
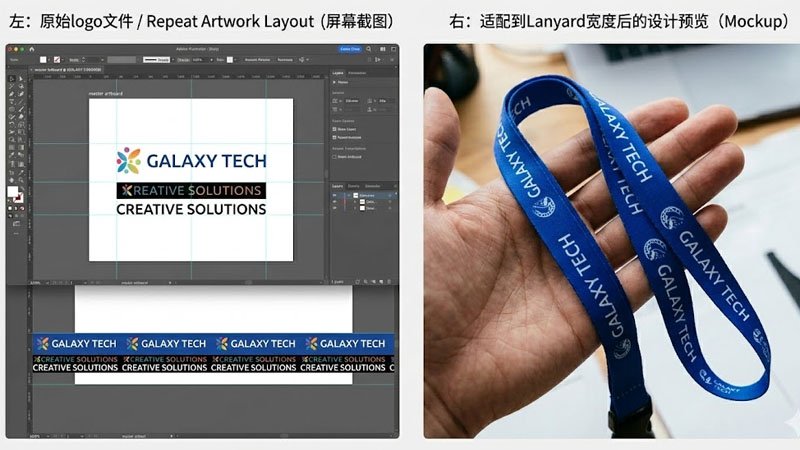
Once the project requirements are confirmed, the next stage is artwork preparation and layout review. This step ensures the design is suitable for the selected lanyard width, material, and branding method.
What is typically reviewed
- Logo file quality and format
- Layout repeat pattern and spacing
- Logo orientation (single direction or alternating direction)
- Readability of text and small elements
- Color reference requirements (e.g., Pantone matching expectations)
- Single-sided vs double-sided design setup
Recommended artwork formats
Vector files are generally preferred for the best print results:
- AI
- EPS
- SVG
High-resolution raster files may be usable for some projects, but low-resolution artwork can reduce print clarity and color consistency.
Important note
Artwork requirements vary depending on the lanyard width and branding method. For example, fine text or thin lines that look clear on screen may not reproduce well on narrow lanyards. A production-oriented artwork review helps prevent misalignment, unreadable text, and avoidable rework.
Step 3: Choose the Right Lanyard Material
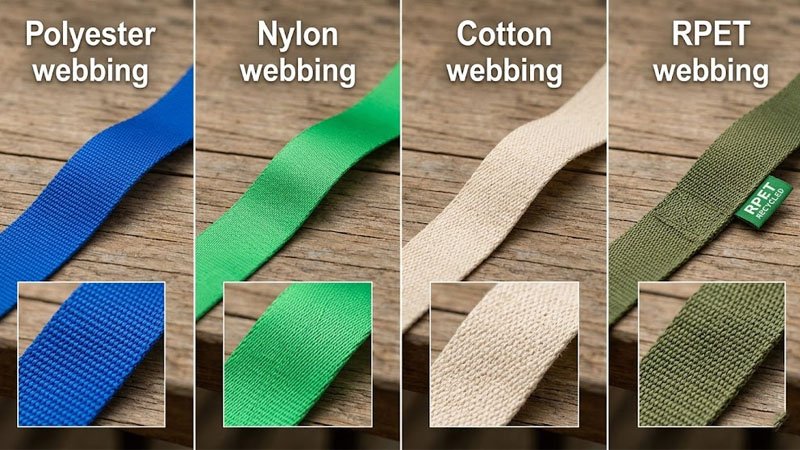
Material selection affects the lanyard’s look, feel, durability, print compatibility, and cost. The best option depends on the end use, branding goals, and budget.
Common lanyard materials
Polyester
- Cost-effective
- Durable and widely used
- Suitable for many promotional, event, and corporate ID applications
- Compatible with multiple branding methods
Nylon
- Smooth surface with a premium feel
- Strong and durable
- Often selected for projects requiring a cleaner, more refined finish
- Can provide strong visual results depending on the printing method
Cotton
- Soft, natural texture
- Suitable for specific branding styles or eco-oriented presentation
- Performance and wear characteristics differ from synthetic materials
Recycled PET (RPET)
- Similar appearance/performance to polyester in many applications
- Supports sustainability-focused branding goals
- Popular for events and brands with environmental initiatives
Why this stage matters
Material selection should be made together with the branding method. A material that looks good visually may not always be the best choice for a highly detailed logo, a tight budget, or a fast lead time.
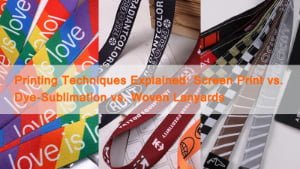
Step 4: Select the Printing or Branding Method
The branding method determines how the logo appears on the finished lanyard and how well it performs in daily use. The best method depends on artwork complexity, color requirements, budget, and quantity.
Common branding options
Screen Printing
A cost-effective option for simple logos and text, especially when the design uses a limited number of solid colors.
Best for:
- simple artwork
- bold text
- limited color designs
Dye Sublimation / Heat Transfer (depending on product setup)
A strong choice for full-color artwork, gradients, and detailed logos.
Best for:
- multicolor branding
- complex graphics
- photo-style or gradient effects
Woven / Jacquard Branding
The logo or text is woven into the lanyard structure, creating a textured and durable finish.
Best for:
- premium appearance
- simple logos/text
- long-term use
Why this stage matters
There is no universal “best” method. A well-matched method improves logo clarity, durability, and cost efficiency while reducing production risk.
Step 5: Approve Samples and Pre-Production Proof
Before bulk production starts, sample approval helps confirm that the product matches expectations in both appearance and configuration.
What may be approved at this stage
- Logo placement and size
- Color appearance
- Material feel and thickness
- Hardware type and finish
- Stitching style
- Print quality and alignment
Typical approval formats
- Digital mockup
- Physical sample
- Partial proofing / process confirmation (depending on project requirements)
Why this stage matters
Sample approval is one of the most effective ways to prevent costly errors in mass production—especially for large orders, first-time collaborations, or projects with strict branding standards.
Step 6: Webbing Preparation and Printing Production
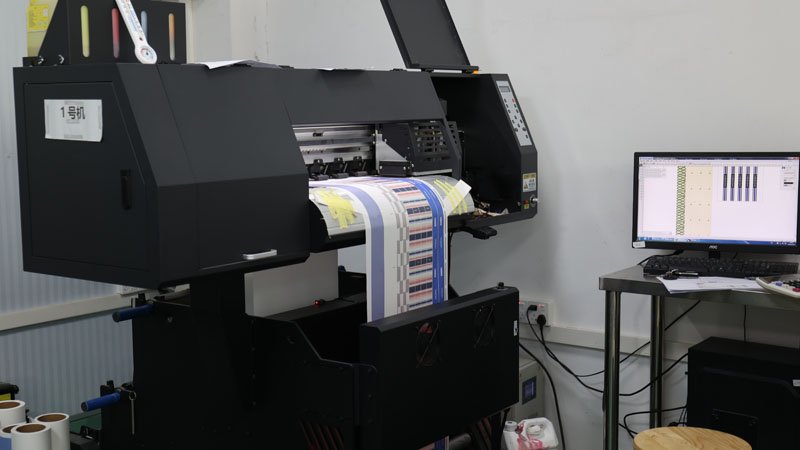
After approval, the order moves into production. At this stage, the selected material and approved artwork are prepared for printing or branding execution.
Typical production flow
- Webbing/material preparation
- Machine or process setup
- Color and alignment verification
- Printing/branding execution
- Drying, curing, or stabilization (as required by the process)
- In-process quality checks
Quality factors monitored during production
- Print clarity
- Color consistency
- Repeat accuracy
- Logo alignment
- Surface condition
Important note
Production steps and equipment settings vary by process (e.g., screen printing, sublimation, woven). A reliable manufacturer controls the process through setup validation and in-process inspection, not just final inspection.
Step 7: Cutting, Sewing, and Hardware Assembly
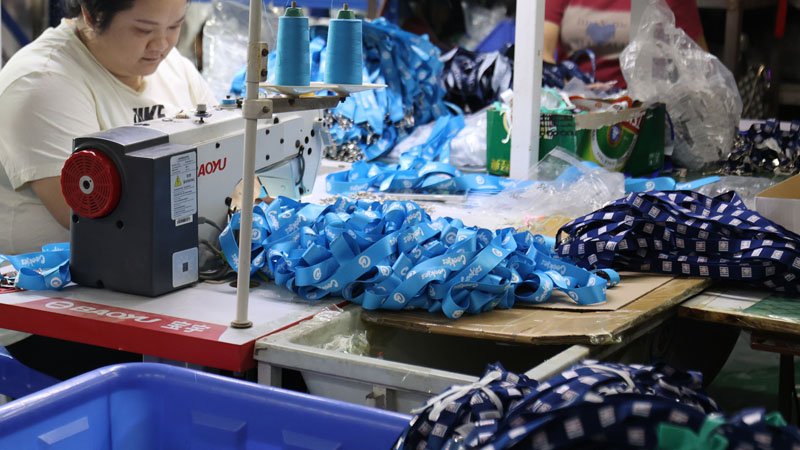
Once the webbing is printed or woven, it moves to assembly. This is where the lanyard is cut to size, sewn, and fitted with hardware.
Main assembly operations
- Cutting to required length
- Folding and positioning
- Reinforced stitching
- Hardware attachment
- Thread trimming and appearance finishing
Common hardware and accessories
- Swivel hook
- Lobster clasp
- Bulldog clip
- Split ring
- Safety breakaway buckle
- Detachable buckle
- Badge reel
- ID card holder / badge holder
Why this stage matters
Final product durability depends not only on the webbing material, but also on stitching quality and hardware attachment strength. Proper assembly is especially important for lanyards used daily in workplaces, schools, and industrial environments.
Step 8: Quality Control and Inspection
Quality control is essential for consistency, especially in large-volume B2B orders. Effective QC should take place at multiple stages of production, including in-process checks and final inspection.
Typical QC checkpoints
- Print clarity and logo readability
- Color consistency across the batch
- Lanyard width and length accuracy
- Stitching neatness and reinforcement quality
- Hardware attachment and functionality
- Surface defects and cleanliness
- Quantity/count verification
- Packaging accuracy
Additional checks (depending on project requirements)
- Tensile strength testing
- Color fastness checks
- Wear resistance checks
- Customer-specific inspection criteria
Why this stage matters
A structured QC workflow helps maintain consistency from sample approval to mass production and reduces the risk of defects reaching the customer.
Step 9: Packaging and Shipment Preparation
After final inspection, the lanyards are packed according to the order requirements and prepared for shipment.
Common packaging options
- Bulk packing
- Individual polybag packing
- Barcode / label application
- Export carton packing
- Retail-ready custom packaging (if required)
Shipment preparation considerations
- Carton labeling accuracy
- Packing list verification
- Batch separation (if multiple SKUs or destinations)
- Shipping method selection (express, air, sea)
- Delivery schedule alignment with event or project dates
Why this stage matters
Proper packaging protects the product during transit, improves warehouse handling efficiency, and reduces receiving errors at the destination.
Common Mistakes That Delay Custom Lanyard Production
Many production delays are preventable and usually occur before manufacturing begins.
Common issues
- Incomplete specifications at inquiry stage
- Low-resolution or non-production-ready artwork
- Unclear hardware selection
- Missing logo orientation confirmation
- Choosing a branding method that does not suit the artwork
- Delayed sample approval
- Material or accessory availability not confirmed in advance
- Unclear shipping terms or delivery deadlines
How to reduce delays
Provide complete project details early, confirm artwork and sample approvals on time, and align material/hardware availability with the production schedule.
What Buyers Should Prepare Before Requesting a Quote
Providing complete information upfront helps manufacturers quote more accurately and recommend the right production method faster.
Pre-quote checklist
- Logo/artwork file
- Quantity
- Lanyard width and length
- Material preference
- Branding/printing method preference (if known)
- Hardware and accessory requirements
- Packaging requirements
- Target delivery date
- Shipping destination
- Any compliance or testing requirements (if applicable)
A complete inquiry reduces follow-up communication and speeds up both quoting and production planning.
Final Thoughts: Quality Comes From Process Control
High-quality custom lanyards are the result of a controlled process—not a single step. Clear requirements, production-ready artwork, suitable materials, matched branding methods, sample approval, precise assembly, and structured quality control all work together to determine the final result.
For buyers, understanding the custom lanyard manufacturing process helps improve order accuracy, reduce delays, and achieve more consistent branding outcomes. For manufacturers, process transparency builds trust and supports long-term cooperation.
When planning a custom lanyard project, working with a supplier that offers clear communication, pre-production support, and multi-stage quality control can make a significant difference in both quality and delivery reliability.
Need support choosing the right material and branding method for your custom lanyard project? A professional manufacturing team can review your artwork, recommend suitable options, and support sampling before mass production to help ensure the best result.