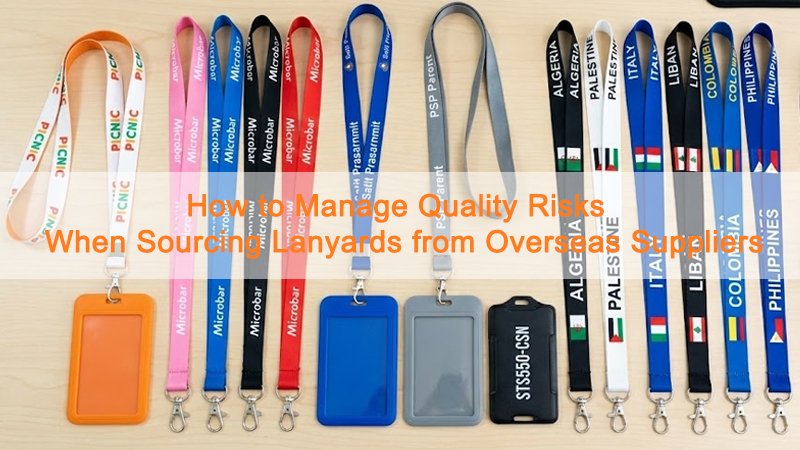
I know the fear. You approve a lanyard design that looks perfect on paper—clean logo, right colors, the right hook. Then the shipment arrives and something is off. The stitching loosens. The clip snaps. The print fades after a few rubs. It happens more often than you think, especially when you’re sourcing overseas and relying on photos, time zones, and assumptions.
The good news is you don’t need a complicated system to reduce these risks. You need a clear, repeatable four-stage quality control framework that starts before production and ends only when your final audit passes. Done right, this approach catches failures early—when fixes are fast and cheap—and keeps mass production aligned with your approved standard.
I felt stuck when my first lanyard batch failed a basic tension test. That experience taught me something important: simple products fail in simple, predictable ways. Now I follow a step-by-step plan that turns quality from a guessing game into a controlled process.
Why Do Lanyards Fail in Predictable Ways?
I used to think lanyards were foolproof. Then clips broke. Straps snapped. Logos rubbed off. And once I started paying attention, I noticed the same patterns repeating across factories and orders.
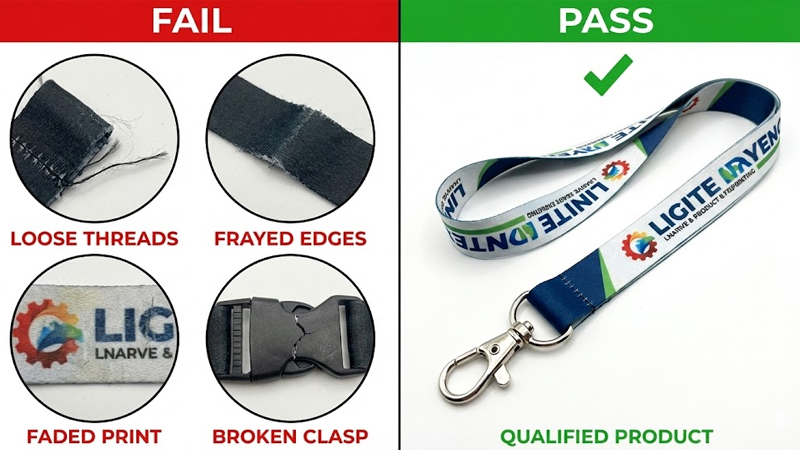
Most lanyard quality issues fall into a handful of failure modes:
-
Weak stitching (thread breaks, bar-tacks missing, uneven seams)
-
Brittle or low-grade hardware (hooks crack, springs fail, plating wears)
-
Poor print durability (smearing, fading, peeling, low contrast)
-
Loose attachments (hardware pulls out, end tips fail, stitching slips)
-
Color mismatch and bleeding (Pantone drift, dye transfer, inconsistent batches)
-
Edge fraying or fuzz (bad heat sealing, low weave density)
Once you know these failure points, you can test early and often—before mass production multiplies a small defect into thousands of unusable pieces.
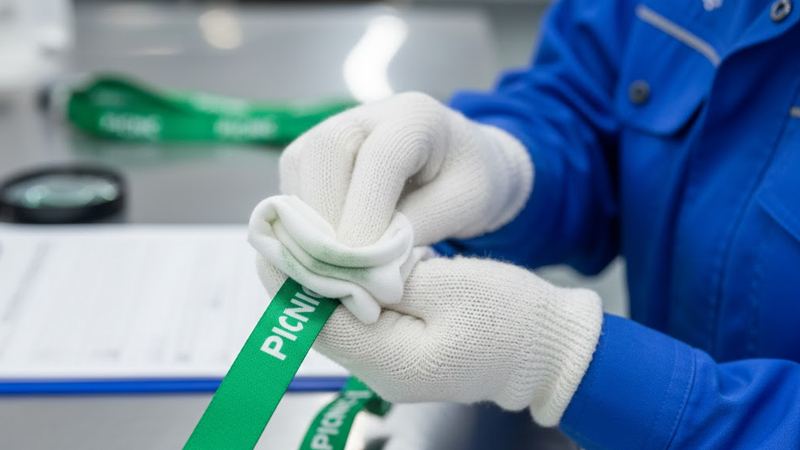
When I review samples, I don’t “look” at them. I challenge them. I pull on clips. I bend hooks. I rub printed areas. I tug seams and attachment points. Each simple test catches a common flaw before it becomes an expensive problem. I also record results in a basic log, because that log becomes the evidence behind every factory conversation.
Here’s the quick table I use as a first defense. It shows suppliers I’m serious, and it makes acceptance criteria easier to discuss.
| Failure Mode | Simple Test Method | Acceptance Criteria (Example) |
|---|---|---|
| Stitching strength | Pull test on stitched areas | No thread breakage, no seam opening |
| Clip/hook durability | Bend + repeated open/close | No cracks, spring returns, no sharp edges |
| Print durability | Rub test on printed area | No visible peeling, smearing, or major fading |
| Attachment integrity | Tug test at hardware/end | No pull-out, no loosening, no deformation |
These are “screening tests,” not a full lab standard. What matters most is consistency: define your method, apply it the same way, and document the results.
Define Quality Before You Choose a Supplier
This is the part most buyers skip—and it’s where most disputes begin.
Factories can only meet what you clearly define. If you don’t specify tolerances, defect rules, and references, “good quality” becomes subjective. The fastest way to reduce quality risk is to lock down a clear spec sheet before you place a PO.
My lanyard spec sheet always includes:
Materials & Construction
-
Webbing material (polyester / nylon / jacquard), width, thickness, finish
-
Stitching method (bar-tack, box-X), thread type and color
-
Edge treatment (heat seal / stitch edge / woven edge)
-
Breakaway buckle type (if needed) and placement
Artwork & Color
-
Print method (sublimation / heat transfer / screen print / jacquard woven)
-
Artwork file format + version number
-
Pantone references (or agreed color standard) and logo placement diagram
-
Repeat length and alignment requirements
Accessories & Hardware
-
Exact hook model and plating type
-
Swivel type, spring strength expectation, sharp-edge requirement (“no burrs”)
-
Optional attachments: phone loop, badge reel, ID holder specs
Tolerances & Defect Rules
-
Width tolerance, length tolerance, placement tolerance
-
Clear defect categories:
-
Critical: safety or compliance issue, sharp edges, breakaway failure (reject)
-
Major: function fails, logo unreadable, hardware cracks (reject)
-
Minor: small cosmetic issues within limits (limited acceptance)
-
This spec sheet becomes your anchor. It protects you from misunderstandings and “silent substitutions,” and it makes inspections measurable instead of emotional.
How to Use a Simple 4-Stage Control Framework
I once tried to manage ten suppliers with no system. I approved designs, chased updates, and hoped the factory would “do the right thing.” Mistakes still slipped in—because hope isn’t a quality strategy.
Now I follow a four-stage framework:
-
Design Review
-
Sample Approval (Golden Sample)
-
In-Line Production Checks
-
Final Audit Before Shipment
Each stage has one job: reduce uncertainty and lock in control.
Stage 1: Design Review (Prevent errors before they exist)
I start with a design review to eliminate avoidable mistakes—especially around print method, color expectations, and construction.
What I confirm here:
-
Is the chosen print method right for the logo complexity and durability expectations?
-
Are colors defined with references and not “similar to the mockup”?
-
Are attachment points and hardware suitable for the expected load and daily use?
-
Are tolerances and defect rules included in the spec?
Output of Stage 1: a finalized spec sheet + artwork version control (no “latest file in WhatsApp”).
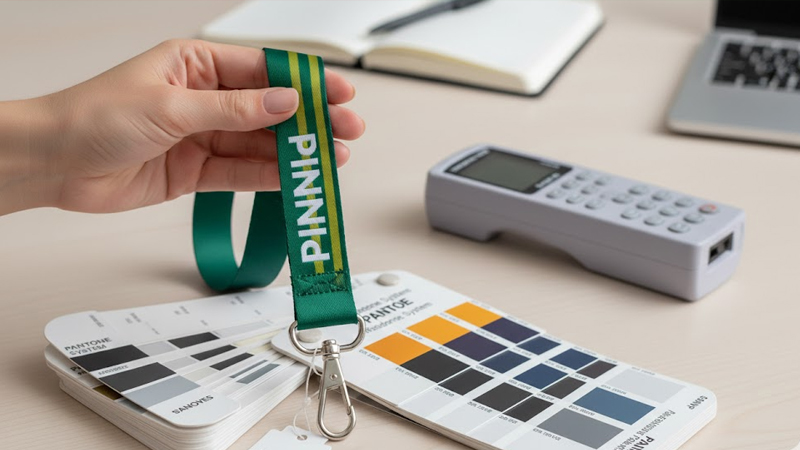
Stage 2: Sample Approval (Create a standard both sides must follow)
Next I request a pre-production sample and test it using the failure-mode checklist above. If something fails, we fix it and re-sample. When everything passes, I lock a golden sample—the physical reference standard that production must match.
I don’t approve samples based on photos alone when color or print sharpness matters. Lighting and cameras lie. A real sample doesn’t.
Output of Stage 2: an approved golden sample + test record (photos + notes + results).
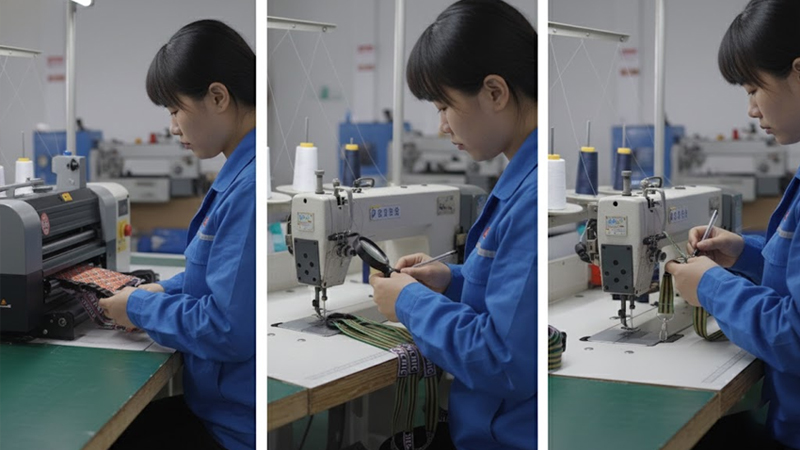
Stage 3: In-Line Checks (Catch drift early)
This is the stage that saves orders. Even good factories can drift during mass production—wrong thread tension, shifted placement, hardware mix-ups, or print alignment changes.
During production, I either visit or hire a local inspector to check key steps. I focus on:
-
Stitching consistency (bar-tack presence, seam strength)
-
Print clarity and alignment (early signs of banding or blur)
-
Hardware correctness (model, plating, finish)
-
Attachment integrity (pull-out risks)
Everything goes into a shared log with photos and batch references.
Output of Stage 3: an in-line report + corrective actions before the run completes.
Stage 4: Final Audit (Decide whether the shipment is released)
At the end, I run a final audit on random units against the spec and the golden sample. I also inspect packaging—because damaged packaging causes real commercial losses even when the product is fine.
Final audit checks:
-
Measurements + tolerances
-
Print quality and color consistency
-
Hardware function and finish
-
Stitching quality and attachment strength
-
Packaging: counts, labels, protection, carton integrity
If something fails, I don’t argue. I hold the shipment and use the spec and inspection record to drive a correction plan.
Output of Stage 4: a shipment release decision backed by evidence.
How to Signal Expertise with Lanyard-Specific Testing
Early on, I sent generic QC checklists. Factories ignored them or asked for “more detail.” What changed everything was switching to product-specific testing that clearly reflects how lanyards are actually used.
I built a lanyard test sheet listing each test with:
-
tools needed
-
steps
-
sample size
-
acceptance criteria
-
photo evidence requirements
The tests I prioritize:
-
Strength and attachment integrity (webbing + stitching + end attachments)
-
Print durability (rub resistance and adhesion)
-
Hardware function (spring strength, swivel smoothness, sharp edges)
-
Color consistency (batch-to-batch drift, bleeding risk)
-
Corrosion resistance (especially for humid shipping/storage)
-
Safety requirements (e.g., breakaway performance when required)
Compliance requirements vary by destination market, so I define them in the PO and request lab reports when applicable. The key is consistency: suppliers learn quickly that I expect proof, not promises.
How to Prevent “Silent Changes” with a Quality Agreement
I’ve seen factories change materials, thread, plating, or print methods without telling me. The lanyards look “close enough” at first glance—but they fail faster in real use.
That’s why I use a simple Quality Agreement (even a one-page document) that includes:
-
the approved golden sample as the acceptance reference
-
“no changes without written approval” clause
-
required tests and inspection stages
-
responsibility for rework, replacement, and re-inspection costs if defects occur
-
batch traceability expectations (so issues can be isolated and corrected)
When a shipment arrives and something is off, I don’t debate opinions. I reference the agreement and the approved standard.
Which Communication Tactics Reduce Mistakes Across Time Zones?
Time zones and language gaps can turn simple instructions into confusion. I lost weeks fixing errors that came from tiny misunderstandings—so I made communication part of my QC system.
What works consistently:
-
Short, structured messages tied to actions (not long paragraphs)
-
Annotated visuals (arrows, measurements, “do/don’t” examples)
-
Fixed weekly check-ins with a shared agenda and notes
-
Shared logs for tests, decisions, and open questions
-
A single “source of truth” file for specs and version control
My favorite tactic is referencing decisions by line number in a shared sheet:
-
“Please confirm item 3.2 (hook model) and 4.1 (thread color) by Friday.”
It reduces back-and-forth and prevents lost context across chat apps.
Quick Checklist for Lanyard Quality Control
When I wrap up an order, I do a fast review before any final payment or shipment release.
-
Design specs approved (materials, tolerances, defect rules)
-
Golden sample approved + test record saved
-
In-line inspection completed + issues corrected
-
Final audit passed + packaging verified
-
Quality Agreement signed (no silent substitutions)
-
Communication log updated (decisions + owners + dates)
I keep an “Owner / Date / Evidence Link” column next to this list. That one small detail turns a checklist into a real system.
Conclusion
I stopped treating quality like a price negotiation. Now I treat it like a roadmap: define the standard, approve a golden sample, control the production process, and release shipments only when evidence matches expectations.
If you source lanyards overseas, the goal isn’t to argue about defects after arrival. The goal is to design defects out—with clear specs, early testing, disciplined inspections, and a quality agreement that prevents silent changes. That’s how you ship with confidence, batch after batch.