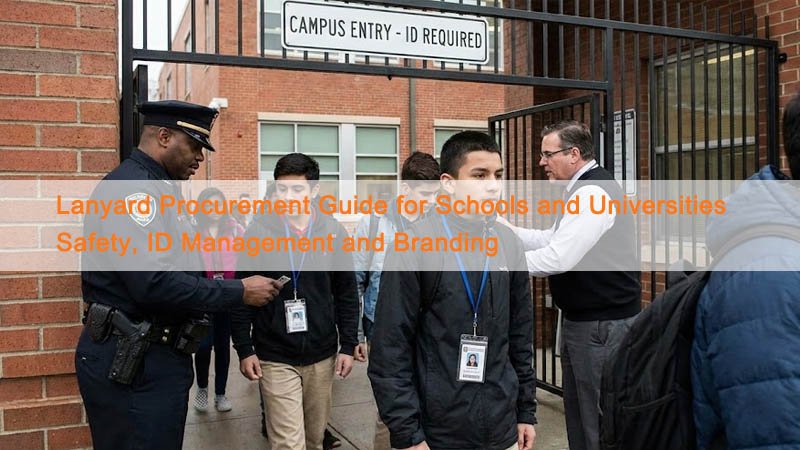
On busy campuses, lost IDs, inconsistent badge visibility, and avoidable safety issues create real operational drag. A standardized lanyard program is a low-cost way to improve compliance, reduce replacement churn, and support safer day-to-day movement across campus.
A well-specified lanyard plan helps you reduce risk, speed up ID checks, and reinforce a professional campus identity. This guide walks through what to specify, how to align stakeholders, and how to procure lanyards that work reliably with your ID program and brand standards.
Lanyards can look like a small detail—until the start-of-term rush, a major event, or a safety review exposes gaps. If you want fewer lost IDs, clearer role recognition, and smoother reorders, a simple procurement framework makes the difference.
Why Lanyards Matter in Education Procurement
An ID program only performs when IDs are consistently worn, clearly displayed, and easy to verify at a glance.
Lanyards keep IDs visible, reduce friction at entrances, and support campus culture. With the right materials and hardware, they last longer, reduce reorders, and make badge checks more efficient in classrooms, halls, and events.
In practice, lanyards function as “wearable infrastructure.” Security teams depend on fast visual verification. Admin and HR teams need predictable issuance and replacement. Student services and event teams need quick identification and easy distribution. When lanyards fray, fade, or fail, compliance drops—and operational noise increases. Start by defining who wears lanyards (students, staff, contractors, visitors) and where (teaching buildings, residences, labs, sports areas, events). Then standardize a core specification and allow limited variations (colors, role text) that support real workflows without creating SKU chaos.
Stakeholders and Decision Criteria
Education procurement moves faster when stakeholders align on a shared decision method, not personal preferences.
Map the teams involved—campus safety, administration, IT/access control, student affairs, events, sustainability, and procurement—then score options against agreed criteria such as safety, durability, print clarity, cost, and lead time.
Lanyards touch multiple departments, so disagreements are common unless you bring structure. Campus safety will prioritize breakaway performance and snag-risk reduction. Admin teams will focus on visibility, consistency, and replacements. Students care about comfort; if the lanyard is irritating or bulky, compliance declines. Events teams want speed and visual impact. Sustainability teams may require recycled content or reduced packaging.
Use a weighted scorecard to keep evaluation objective. A typical weighting might look like:
-
Safety features (breakaway, snag-risk controls) – 30%
-
Durability (webbing wear, stitching, hardware strength) – 25%
-
Print clarity & color consistency – 20%
-
Cost & total cost of ownership – 15%
-
Lead time & supplier responsiveness – 10%
Adjust weights by setting (K–12 tends to weight safety higher; universities may weight branding and event readiness more). Once weights are agreed, suppliers can quote against clear priorities and you can compare bids consistently.
Safety First: What to Specify and Why
Safety needs are context-driven, but breakaway design is a baseline requirement for most education environments.
Specify a neck breakaway feature, skin-safe materials/inks, and snag-risk controls where needed. Validate performance with physical samples and basic checks before full production.
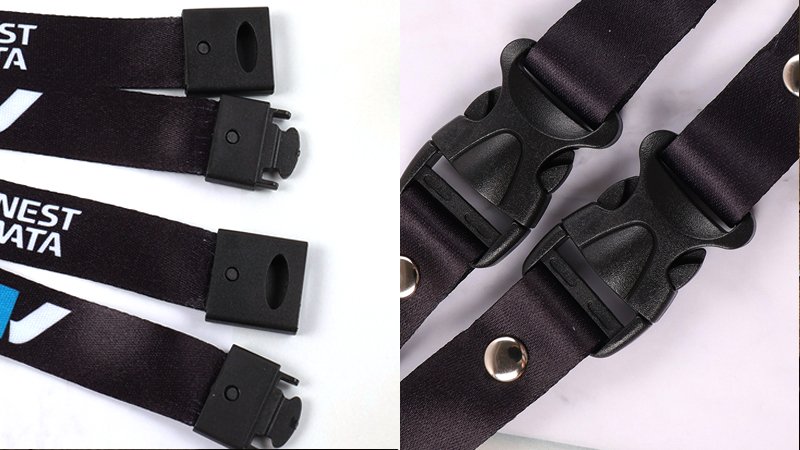
Treat safety as a specification, not an assumption. Start with a neck breakaway clasp as your default. For higher-risk environments—labs, workshops, sports facilities, and younger student settings—consider shorter lengths, snag-reducing setups, and designs that limit loose small parts.
Instead of relying on a single “universal” force number, ask suppliers to confirm consistent breakaway behavior and provide any available test notes or documentation. Your safety team can define acceptable release performance based on campus risk.
Also request material safety/restricted substance information where applicable, and run a simple sample validation: comfort, stitching integrity, hardware reliability, and basic wipe/wash resistance. This is often where avoidable issues are caught early.
ID Management: Build a System, Not Just a Lanyard
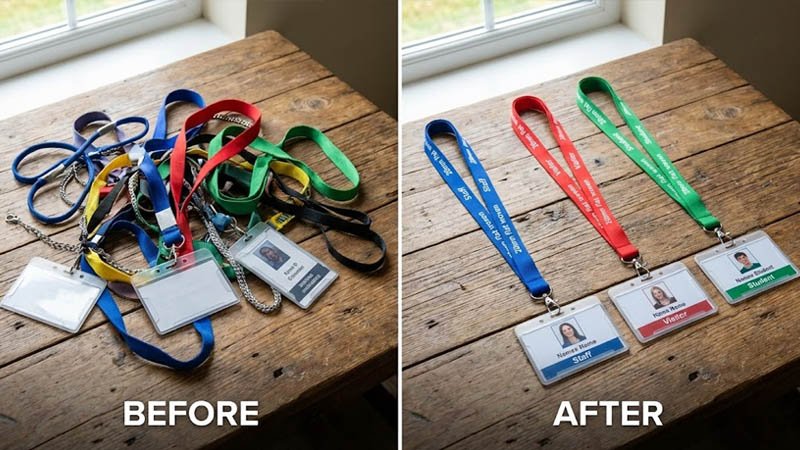
If IDs are frequently lost or hard to verify, the root cause is usually the whole wearing system—lanyard, holder, and attachment—working poorly together.
Pair lanyards with the right badge holders and attachments so IDs stay visible, scannable, and harder to lose. Standardize issuance and replacement to reduce reprints and admin workload.
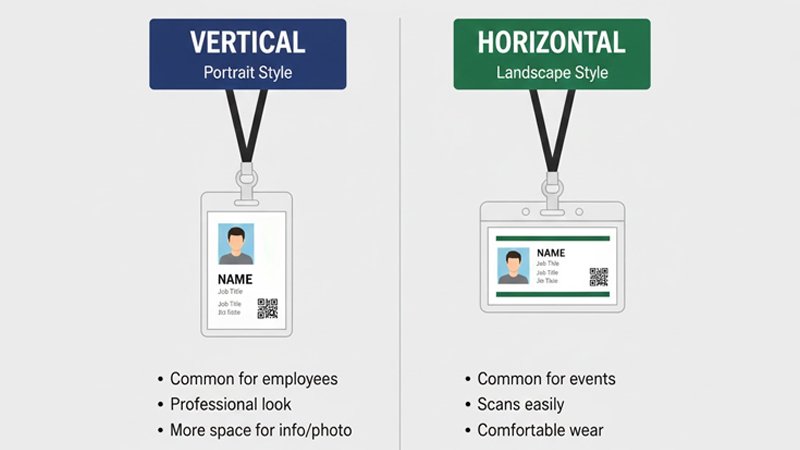
Start with how IDs are checked on your campus. If staff verify visually, prioritize visibility, readability, and anti-flip behavior. If your workflow relies on scanning (barcode or RFID access cards), ensure holders and attachments keep the card oriented and accessible without constant removal.
Choose holder format (vertical/horizontal) based on your ID layout. Use attachments that reduce rotation if your badges flip frequently—dual-clip setups or stabilizing holders help. For daily wear programs, prioritize retention and durability; for events, prioritize fast distribution and quick swaps.
Finally, define operational basics: where lanyards are issued, how replacements are requested, how many spares are held, and who owns approvals. Standardization reduces confusion and makes reordering predictable.
Branding That Supports Operations (Not Just Aesthetics)
Branding adds value when it improves recognition and professionalism—not when it complicates designs or drives frequent reorders.
Use branding to reinforce role recognition and campus identity. Choose print methods and color controls that hold up to daily wear so your program stays consistent across departments.
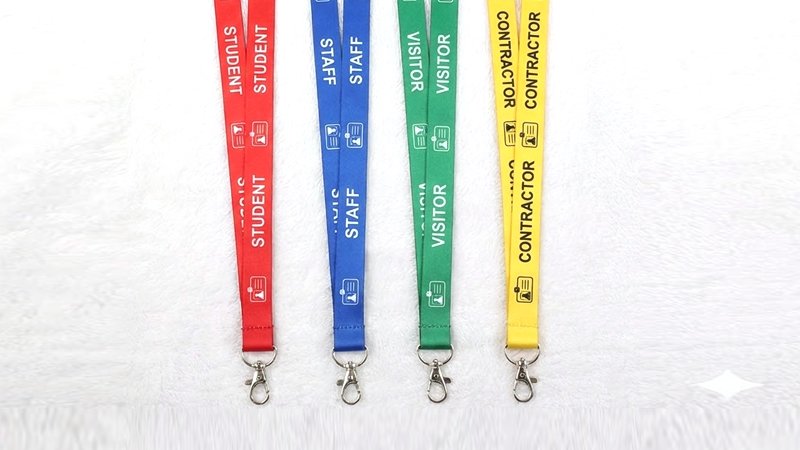
A clean lanyard design supports real campus workflows. Color is a practical tool: it helps staff quickly distinguish students, faculty, contractors, and visitors. Keep text readable at distance with high-contrast layouts and consistent logo repeat spacing.
Select printing based on brand needs. Full-color designs often suit polyester-based processes, while simple bold marks may suit lower-complexity options. For staff programs or premium use cases, woven styles can deliver a higher-end look with excellent longevity.
If you run evening events or outdoor programs, reflective elements can improve visibility, but treat them as an operational feature—ensure they don’t compromise logo clarity or readability.
Materials and Printing Methods: What Works Best on Campus
Comfort and durability drive compliance. When people say “lanyards don’t work,” they often mean the lanyards weren’t comfortable or didn’t last.
Match materials and printing to the use case: polyester for vibrant full-color output, nylon for a smoother feel, and woven options for long-term durability and premium presentation.
For complex artwork and strong color, polyester-based solutions are common. Nylon is often chosen when a smoother touch and premium feel matter. Woven/jacquard styles are frequently used where longevity and a higher-end impression are priorities.
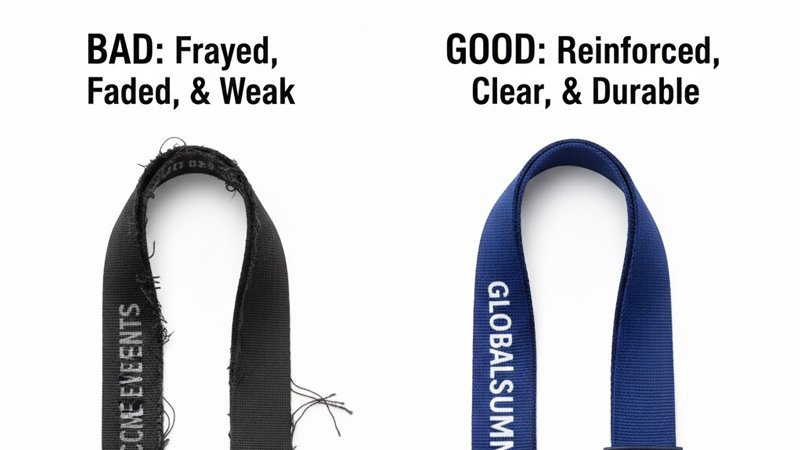
From a procurement perspective, the biggest durability drivers are not marketing claims—they’re build details: edge finish (fray resistance), reinforced stitching at stress points, and hardware quality. Require samples and validate the basics: comfort, abrasion resistance in printed areas, and how hardware performs under daily use.
Sustainability and Compliance Considerations
Sustainability is increasingly part of education procurement, and it often affects material choice, packaging, and restricted substances requirements.
Consider recycled materials and lower-impact inks, and request compliance documentation appropriate for your region. Sustainability also improves when products last longer and are reused effectively.
Recycled PET (rPET) is a common choice because it performs similarly to standard polyester while supporting sustainability goals. If your campus policies restrict certain plastics or require restricted substances compliance, include those requirements clearly in your RFQ so suppliers quote correctly from the start.
Operational changes often deliver the biggest impact: bulk packing by department, reduced individual packaging, and reuse programs for events (collect, sanitize, redeploy). In practice, standardization and durability are major sustainability levers because they reduce waste and replacements.
Procurement Planning: Budget, Lead Times, and Risk Control
Education demand is seasonal. Your best pricing and availability come from planning around intake and event peaks.
Forecast demand using headcount and event calendars, plan lead times based on customization and shipping, and maintain buffer stock to avoid last-minute rush orders.
Start with a simple annual forecast: student intake, staff onboarding, contractor access, events, and expected replacements. Maintain a buffer (often 5–15%, depending on historical loss and turnover). Request quotes in quantity tiers so you can balance unit cost and cash flow.
Lead time is usually determined by proof approval, sampling, production, and shipping method. The most common delay is internal—late artwork approval—so assign an owner and timeline. To reduce risk, define acceptance criteria (color consistency tolerances, stitching quality, hardware performance) and confirm the supplier’s defect policy upfront.
Standard Specs You Can Use (RFQ / Tender Ready)
Clear specifications produce comparable quotes. Vague RFQs produce noise and inconsistent bids.
Define width, material, breakaway safety, attachment hardware, printing, packaging, compliance needs, testing expectations, and quantity tiers so suppliers quote against the same baseline.
Use a spec block like this (edit as needed):
| Field | Example spec (customize to your campus) |
|---|---|
| Material | rPET polyester (or polyester/nylon based on use case) |
| Width | 15 mm (events) / 20 mm (daily wear) |
| Length | Standard adult length; shorter option for high-risk zones |
| Safety | Neck breakaway clasp (required) |
| Attachment | Swivel hook (standard); dual-clip/anti-flip option if needed |
| Quick release | Detachable buckle near attachment (optional) |
| Printing | Full color (as needed) / simple logo method (as needed) |
| Artwork | Vector files; Pantone references where brand accuracy matters |
| Compliance | Restricted substances statement and material safety info as required |
| Packaging | Bulk by department with labels; minimize individual packaging if required |
| Quantity tiers | 500 / 1000 / 2000+ |
| Lead time | From sample approval; specify shipping method |
| Sample validation | Comfort, wear, wipe/wash resistance, hardware reliability |
This structure eliminates ambiguity and speeds selection because bids become truly comparable.
Cost of Ownership: The Hidden Numbers Procurement Should Track
Unit price is only one line item. The long-term cost sits in replacements, reprints, and staff time.
Track replacement rate, expected lifespan, admin handling time, and ID reprint impact. Compare annual cost per user, not just cost per lanyard.
A practical total cost view includes:
-
Unit price
-
Expected lifespan under daily wear
-
Replacement frequency (breakage, discomfort-driven non-use, loss)
-
Admin time per replacement (requests, issuance, tracking)
-
Optional: event wastage, recycling/disposal costs
Even modest durability improvements can reduce replacements and the admin burden that comes with them—often delivering greater savings than a lower unit price.
Implementation Checklist (Before You Place the PO)
Most failures are preventable and usually happen because proofs and samples weren’t reviewed carefully.
Confirm artwork, validate a physical sample, verify compliance documentation where required, and align delivery with your rollout plan.
Use this pre-PO checklist:
-
Approve artwork proof (logo direction, repeat spacing, front/back layout).
-
Confirm color references (Pantone or campus brand standards).
-
Review a physical sample for comfort, print clarity, and hardware reliability.
-
Confirm breakaway design is included and consistent with your safety needs.
-
Verify any required compliance documentation (restricted substances/material safety).
-
Confirm packaging format, labeling, and carton counts.
-
Confirm lead time, shipping method, and delivery schedule.
-
Define acceptance criteria and defect/return handling.
-
Finalize distribution and replacement workflow.
-
Plan inbound QC spot-check on delivery.
This keeps rollouts smooth and gives procurement a clear audit trail.
Common Mistakes Schools Make—and How to Avoid Them
Most problems come from unclear specifications, skipping samples, and treating lanyards as one-off event items rather than an ongoing program.
Avoid vague RFQs, over-optimizing for unit price, ignoring safety context, and skipping buffer stock. Standardize a base spec and customize only where it improves operations.
Dive deeper paragraph
Typical pitfalls and fixes:
-
Lowest-bid selection without durability checks → compare total cost of ownership.
-
Confusing “breakaway” with “attachment clip” → specify safety clasp and attachment as separate items.
-
No physical sample validation → require a sample and run basic wear/wipe checks.
-
No holder strategy → standardize holder orientation and anti-flip where needed.
-
No spare inventory → maintain buffer stock and reorder triggers.
-
Unclear ownership for approvals → assign an internal owner for artwork and sign-off timelines.
These small process improvements prevent delays, reduce replacements, and improve compliance.
Conclusion: A Simple Decision Framework
A reliable campus lanyard program comes down to three decisions:
-
Standardize safety and daily-wear durability, 2) design for ID visibility and retention, and 3) use branding to strengthen role recognition and professionalism.
With clear stakeholder alignment, RFQ-ready specifications, and sample validation, you reduce risk, cut long-term costs, and keep your ID program running smoothly.